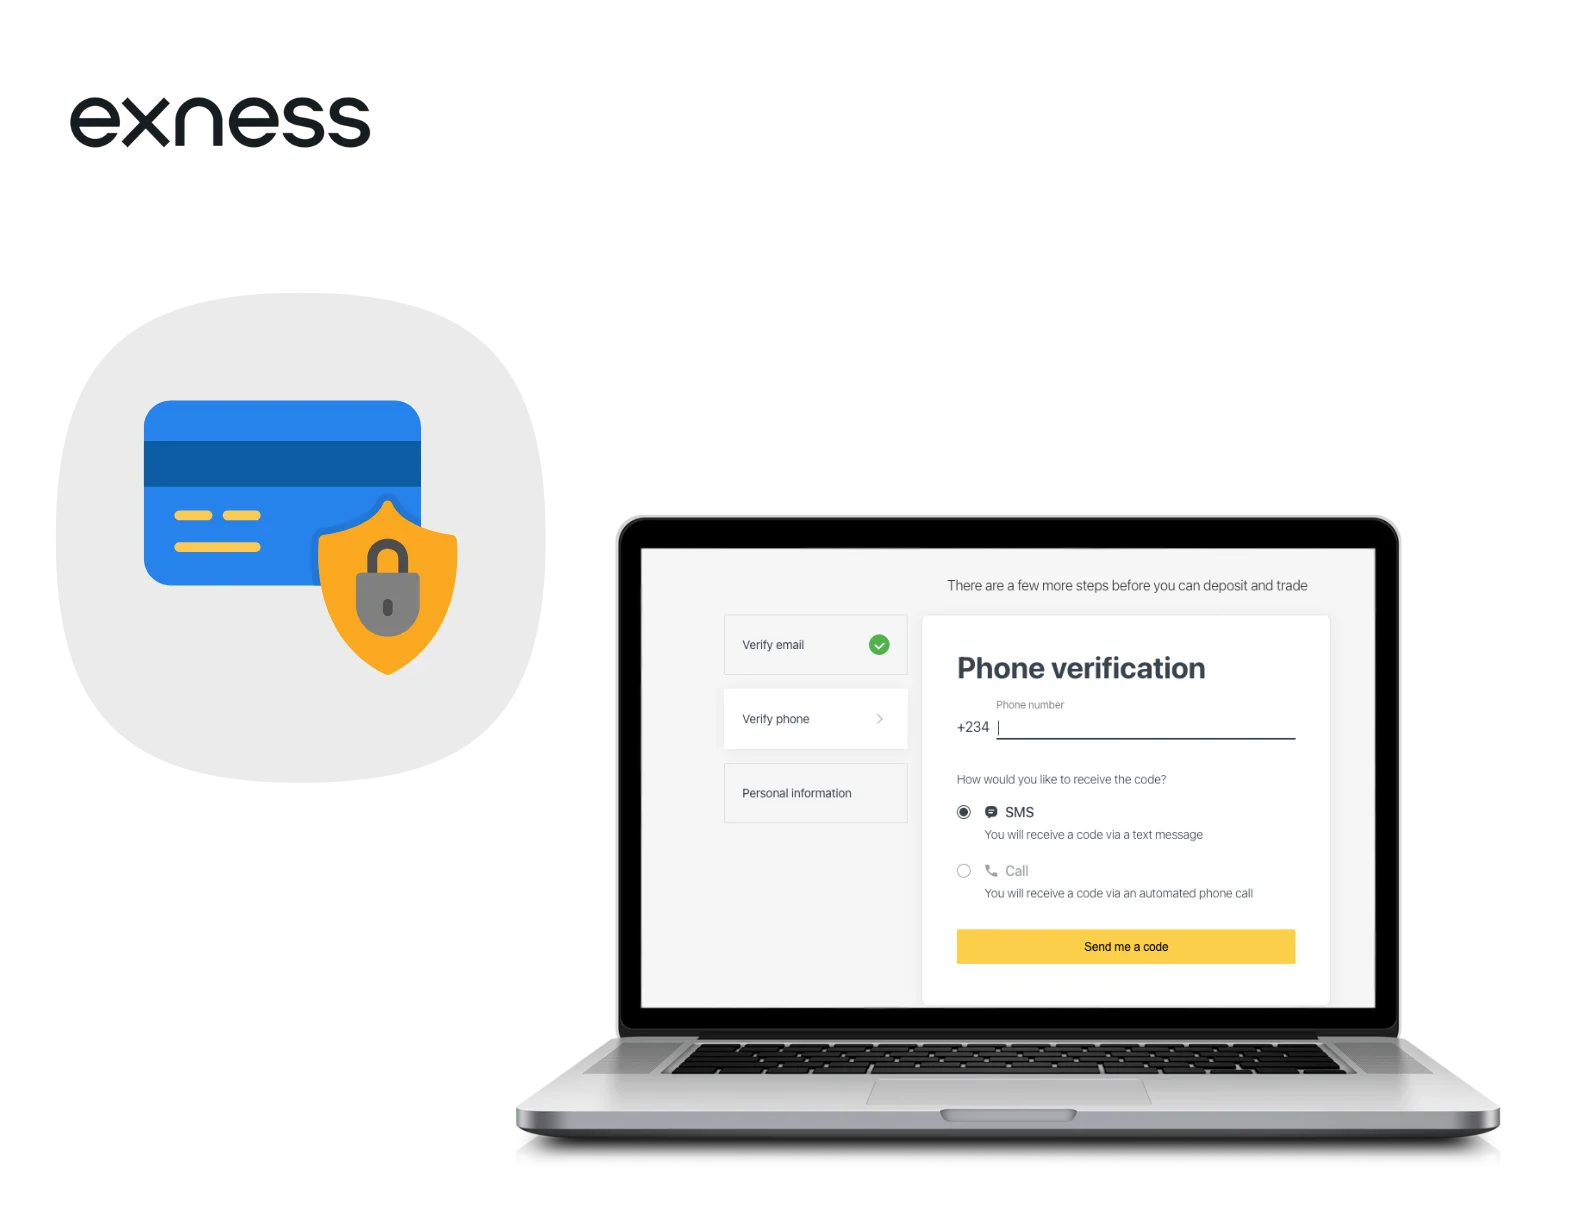
Exness Card Verification Requirements
As a trader who’s been using Exness for years, I can tell you that card verification is crucial before you can start withdrawing funds. The process isn’t complicated, but you need to follow specific requirements to avoid delays. Exness implements these verification steps to protect your account and comply with international financial regulations.
Required Documents for Card Verification
To verify your card on Exness, you’ll need to provide clear documentation proving you’re the legitimate cardholder. From my experience, this typically includes a photo of both sides of your physical card and sometimes a bank statement.
For the card photos, make sure to display the first 6 and last 4 digits of your card number while covering the middle digits for security. The CVV code on the back should also be hidden. I learned this the hard way after my first submission was rejected for showing too many digits.
Additionally, Exness might request a recent bank statement (within the last 3 months) that shows your name, card number, and bank details. This isn’t always required, but having it ready can speed up the process.
Process of Uploading and Verifying Documents
The verification process is straightforward if you follow these steps:
- Log into your Exness Personal Area account
- Navigate to the “Verification” section in your dashboard
- Select “Card Verification” from the menu options
- Click “Add New Card” to start the verification process
- Enter your card details as requested on the form
- Upload clear photos of both sides of your card (with middle digits and CVV covered)
- Upload your bank statement if requested
- Review all information and click “Submit”
- Wait for confirmation email that your documents have been received
I recommend using the mobile app for uploads since you can take photos directly with your phone. Much easier than scanning documents on a desktop setup.
Photo/Scan Quality Requirements for Verification
Quality matters when submitting verification documents. I’ve had submissions rejected because of poor lighting, so learn from my mistakes.
Your card photos must be clear, well-lit, and show all four corners of the card. The text on the card should be perfectly legible. Blurry or pixelated images will be rejected immediately. Photos should be in color and not heavily edited.
File size typically needs to be under 5MB, and acceptable formats include JPG, JPEG, PNG, and PDF. I typically use PNG format since it maintains clarity without excessive file size.
Make sure the card appears in full frame without being cropped. Hold the card against a plain, contrasting background (white works best) to ensure all details are visible.
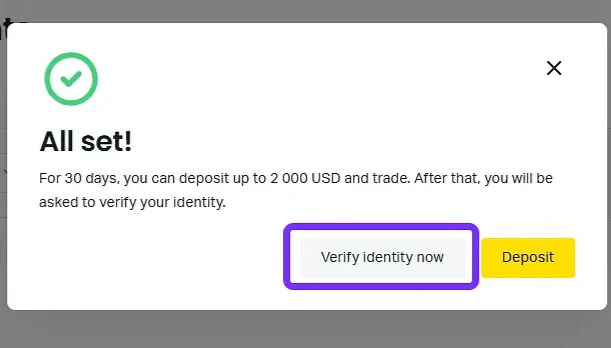
Verification Timeframes and Status Updates
The verification process timeline varies based on submission volume and document quality. Here’s what you can typically expect:
| Verification Stage | Average Processing Time | Maximum Time |
| Initial Review | 1-2 hours | 24 hours |
| Additional Review | 24-48 hours | 72 hours |
| Rejection Resolution | 12-24 hours | 48 hours |
| Final Approval | 1-2 hours | 24 hours |
Once you’ve submitted your documents, you can check your verification status in your Personal Area under the “Verification” section. The status will show as “Pending,” “Approved,” or “Rejected.”
In my experience, most verifications are completed within 24 hours, but during busy periods it might take up to 72 hours. Exness generally sends email notifications for each status change, but I still recommend checking your Personal Area directly.
Common Reasons for Verification Rejection
I’ve had verification attempts rejected a couple times, and it’s usually for one of these reasons:
Poor photo quality is the most common issue. If your images are blurry or poorly lit, they’ll be rejected immediately.
Card details not matching account information is another major reason. The name on your card must exactly match the name on your Exness account. Even small discrepancies can cause rejection.
Incorrect coverage of sensitive information can also cause problems. If you show too many digits (or too few), your submission will be rejected. Only the first 6 and last 4 should be visible.
Expired cards won’t be accepted for verification. Double-check your card’s expiration date before submitting.
If your verification is rejected, don’t worry. The system will usually tell you exactly what went wrong, and you can resubmit with corrections.
Frequently Asked Questions (FAQ)
What documents are required for Exness card verification?
You need photos of your card. Show the first 6 and last 4 digits only. Cover the middle digits. Hide the CVV code on the back too. I once got my submission rejected because I showed too many numbers. Sometimes they ask for a bank statement from the last 3 months. This isn’t always needed. But it’s smart to have it ready.
How do I upload my card verification documents?
Log in to your Exness account. Go to “Verification.” Click “Card Verification” and then “Add New Card.” Follow the steps to enter your card info and upload photos. I find it easier to use my phone for this. The app lets you take pictures right away without scanning. You’ll get an email when your stuff is received.
What are the quality requirements for uploaded photos or scans?
Your photos must be clear. No blurry images. Make sure we can see all four corners of your card. All text should be easy to read. Put your card on a plain background – white is best. The file should be smaller than 5MB. You can use JPG, JPEG, PNG, or PDF. I always take photos during the day by a window. Natural light works much better than lamps or ceiling lights. Make sure nothing is cut off in the picture.
How long does the card verification process take?
Most verifications finish in 1-24 hours. It can take up to 3 days if they’re busy. When I submitted perfect photos, I got approved in just 2 hours. But once when I made a mistake, it took an extra day to fix and get approved. Do it right the first time. This saves you a lot of waiting. Follow all the rules carefully.
How can I check the status of my verification?
Check your status anytime in your Exness account. Just go to the “Verification” section. You’ll see if it’s “Pending,” “Approved,” or “Rejected.” They send emails too, but I like to check my account directly. It’s faster. If you wait more than 2 days with no answer, contact support through chat. They can tell you what’s happening. I’ve found the chat support team is quick to help with verification issues.
You may also be interested in: